Tim Rausch Plumbing LLC - Logo

Call For Service

Text With A Question? (920) 378-0918

,
This is a placeholder for the Yext Knolwedge Tags. This message will not appear on the live site, but only within the editor. The Yext Knowledge Tags are successfully installed and will be added to the website.

Blog Layout

How to Remove Soap Scum From Shower Walls

Rose Morrison | Renovated • July 14, 2021

It’s easy for soap scum to make its way into your shower. The fatty acids that come from your bar soaps react to water, and as a result, they cling to surfaces throughout your bathroom. And once it builds up, it can be hard to remove soap scum from shower walls.

While you can’t eliminate soap scum completely, it’s possible to manage it. Here’s how to remove soap scum from shower walls, shower curtains, bathroom fixtures and more.


Choosing the Right Shower Cleaners

You can either purchase a commercial product or make your own cleaner. Either option works, so it’s up to your preferences. You’ll likely be able to use a homemade cleaner for more than one surface. For example, a commercial product won’t always be suitable for a surface like a glass shower door. Consider how much cleaner you’ll need to tackle your bathroom.

You can make a homemade soap scum cleaner with a few ingredients and tools. You’ll need:

  • Baking soda
  • White vinegar
  • Dish soap
  • Table salt (optional)
  • Microfiber cloths
  • A soft-bristled brush
  • A spray bottle

You’ll use some or all of these ingredients depending on the material of your shower. In most cases, you can combine the baking soda and white vinegar to form a paste. In other instances, it’s better to use a mix of white vinegar with water. Check out the four types of shower wall materials listed below to learn more.

These ingredients will eliminate soap scum from ceramic tile and glass doors. If you have a shower made with stone or fiberglass, it’s best to purchase a special cleaner so that you don’t cause damage. You can clean metal fixtures with the products listed above. A brass surface only needs water.

It’s always a good idea to test your products beforehand. If you don’t trust yourself to make a safe DIY cleaner, you should look for products at the store. Always choose options for your specific shower wall material — and the gentler, the better.


How to Apply Cleaner to Your Shower

Here’s how to apply the cleaner to your shower to remove soap scum from shower walls. You’ll need to use the right method according to the material of your shower walls. You should clean your shower at least once a week to prevent soap scum buildup.


1. For Tile Surfaces

How do you remove soap scum from a tile shower? Take a look.

Combine one part vinegar with one part water. Add a little dish soap and pour the mixture into a spray bottle. Spray the solution onto the tile liberally. You’ll want to let the product rest for 15 to 30 minutes. You could use this time to clean elsewhere if needed.

When you return, you’ll use the brush to scrub the entire surface gently. Then, you should rinse the area with warm water. Use a cloth to dry the tiles thoroughly. Repeat this process whenever you notice any soap scum remnants. You can’t fully eliminate soap scum, but it’s easy to keep at bay with this cleaner.


2. For Glass Surfaces

Mix the baking soda and white vinegar together until you have a paste. Moisten a clean cloth with the mixture. If you have a particularly large mess to handle, you can dip the cloth into a little table salt to add grittiness. This mixture will remove extensive soap scum more easily. Don’t go overboard because you want to avoid scratches.

Rub the mixture onto the targeted area. Let the paste sit on the surface for at least 15 minutes. Then, you can use a damp cloth to remove the mixture. Rinse the door or enclosure with warm water before you use a clean cloth to dry it.

It’s essential not to use overly abrasive ingredients or tools on your glass fixtures since they can become scratched. If you make this mistake, it’s generally simple to remove any fine scratches from those surfaces. Feel free to clean your tile and glass surfaces simultaneously so that you can tackle two areas at once.


3. For Granite and Marble Surfaces

A natural stone surface will be more challenging to tackle than others. That’s because it’s fragile when compared to materials like tile. Therefore, it’s necessary to use special cleaners and methods. Be sure to follow these steps carefully.

Look for a commercial cleaner that targets soap scum or hard water on natural stone. If you want to use a DIY recipe, it’s crucial to test your product in an unnoticeable spot. This process will ensure you don’t damage your entire shower wall.

Follow the instructions according to your chosen product. You’ll likely have to spray the substance and let it sit for around 15 minutes. Then, you can use a soft brush or cloth to scrub everything around so that you remove the soap scum.


4. For Fiberglass Surfaces

Fiberglass tends to be a popular material for shower stalls. Like with natural stone, you have to use a non-abrasive cleaner for fiberglass so that nothing becomes dull. A commercial product made for fiberglass is your best bet. That said, you can also use a mixture of baking soda and white vinegar.

Follow the directions for your specific cleaner. If you’re going the DIY route, you should mix your baking soda and white vinegar together to form a paste-like consistency. Spread that across your shower walls. Then, you should let everything rest for 10 minutes before you rinse and dry.

If your soap scum problem is pretty intense, you should substitute the white vinegar for hydrogen peroxide. Let that mixture sit for around 30 minutes. Borax can also work well for tough stains on certain parts of your shower.


What About Other Surfaces?

There are times when you’ll notice soap scum around your sink, counter or other spots throughout your bathroom. Your shower curtains can even get stained with soap scum. A few tricks will help you clean those areas and items.

White vinegar will be your best friend for these instances. This ingredient works best for chrome and other metal surfaces. You can also use it to clean your showerhead. If your faucet is brass or bronze, it’s best to just use water. You can always dilute the white vinegar with water to make your mixture gentler.

Tougher grime around your bathroom can be tackled with baking soda and lemon juice. It’s always smart to do a spot test before you use anything. This way, you won’t inadvertently damage any fixtures or surfaces.

It’s easy to clean your shower curtains, too. A mixture of water and vinegar works well for this process, as well. This trick works for both plastic and fabric shower curtains. While your shower curtains get washed, you can clean your shower walls. Easy!


Ways to Prevent Soap Scum

This soap scum issue only happens when you use bar soap. A liquid shampoo or conditioner won’t leave any residue behind. You may want to switch out your current products for these alternatives if you’ve had to deal with excess soap scum.

You could also install a water softener if your current system uses hard water. The minerals that make up hard water create an ideal environment for soap scum. Some salts or pellets could be useful if you don’t want to take on such a significant project.

Also, you should make sure that your shower stays dry whenever you don’t bathe. A shower that stays wet or damp for a long time after use can help soap scum gather. Use a squeegee to wipe down the walls and door after you step out.

These efforts will ensure that you don’t have to clean as often. There won’t be so much buildup — and that means less maintenance for you. Be sure to keep an eye on your shower curtain, as well.


Use These Tips to Keep Your Shower Sparkly Clean

The methods for how to remove soap scum from shower walls vary for different surfaces. But these quick tricks can keep your shower walls clean and maintained every week. As long as you keep up with the soap scum, it’ll be a lot easier to handle.


Source: https://renovated.com/how-to-remove-soap-scum-from-shower-walls/

plumbing service
July 22, 2024
When we ignore issues that need plumbing service, they often get to be much larger than what they originally were. Read on for what can happen!
plumbing contractor
February 13, 2024
Are you experiencing plumbing issues? Read more to identify the signs you need to call a professional plumbing contractor.
By Lee Wallander & Richard Epstein September 27, 2022
A leaking refrigerator can feel like a drastic enough situation that you may think it's time to shop for a new fridge. But a leaking refrigerator doesn't necessarily mean that your fridge is on its way out . Over time, blockages and clogs, frozen sections, loose valves, or misaligned parts can develop leaks in the refrigerator . You can usually fix or clear these leaks by yourself, using simple tools—saving a call to the appliance repair company. Defrost Drain Is Blocked The evaporator coils will drip water onto the bottom of the freezer compartment if the defrost drain is clogged with debris or is frozen. These drips can continue onto the refrigerator shelves and even onto the kitchen floor, especially if the door gasket is dirty or faulty. Fixing a Blocked Defrost Drain You should thaw any ice buildup in the drain and flush the drain with hot water to clear debris. Have lots of towels around to mop up spills. Find the defrost drain, usually located in the back of the refrigerator. With a cordless drill, turn out any screws holding the cover in place. If the drain is frozen over, thaw it out by directing a hairdryer over it. Clear the drain tube by directing hot water into the tube. Use a squirt bottle or turkey baster to direct water into the drain hole. Refrigerator Is out of Level Moisture condensing on evaporator coils can leak out of the refrigerator. Also, a refrigerator that's out of level taxes the motor and pump. Setting the refrigerator level not only reduces leaking but helps with the unit's overall functioning. [Tip] Consult your refrigerator's manual for leveling instructions. Some fridges may need to be slightly higher (about 1/4 inch) in front than in back. Leveling a Refrigerator Place a bubble level on top of the refrigerator. Position the level from front to back. Remove the grille (near the floor) by pulling it toward you. With an adjustable wrench, turn the front roller legs clockwise to raise the front of the unit and counter-clockwise to lower it. Check for front-to-back level. For level fridges, the bubble should rest between the two marks on the indicator. Check side-to-side level. Move the bubble level 90 degrees so it runs from side to side. Adjust the front roller legs with the wrench until the unit is level. Replace the front grille by snapping it back into place. [Tip] For fridges that need to be higher in front, raise the back end of the bubble level. Measure the distance from the bottom of the level to the top of the fridge. The measurement should be 1/4 inch. If not, raise or lower the refrigerator's front roller legs until the measurement is 1/4 inch. Water Inlet Valve Is Loose or Damaged Located on the back of the refrigerator, the water inlet valve supplies water to the freezer to make ice and to the dispenser for fresh water. The copper or plastic tubing may be damaged or loose. Or the brass water inlet valve might be damaged or have come loose. Leaks at this point will drip and pool around the bottom of the refrigerator and can make it appear as if water is coming from inside the box of the fridge. Fixing a Loose or Damaged Water Inlet Valve Pull the refrigerator away from the wall to access the back of the fridge. Look for the rigid copper tube or plastic tube entering the fridge from the direction of the kitchen sink. Use an adjustable wrench to tighten the brass nut where the tube attaches to the fridge's inlet valve. If that doesn't fix the problem—and water is still leaking here—the water inlet valve should be removed and replaced by an appliance technician. Water Filter Is Misaligned or Faulty The refrigerator's water filter cleans and filters water from the house's water supply on the way to the fridge's water dispenser . A misaligned or defective water filter can leak water into the refrigerator. Typically, the water will be concentrated on a top shelf of the refrigerator since the filter is usually located on the roof of the refrigerator box. Fixing a Misaligned Water Filter Find the water filter housing on the roof of the refrigerator box. Swing down the housing door. Twist out the water filter, then twist it securely back in place. If this does not fix the leak, try replacing the filter with a new water filter. Door Gasket Is Dirty or Faulty The rubber gasket around the inside of the refrigerator door may be leaking water from the inside of the box to the outside. Fix by cleaning or replacing the gasket. While this will not stop leaks inside of the refrigerator box, it will prevent those leaks from reaching the kitchen floor. Fixing a Dirty or Faulty Door Gasket Make a solution of warm water and a squirt of dishwashing detergent. Dip a clean rag in the solution and then squeeze it out. Wipe the rag all the way around the door gasket , particularly the section where it meets up with the refrigerator body. Remove all debris. Thoroughly wash out the rag. Run cool, clean water over the rag, squeeze it out, and use it to wipe the soap residue off of the door gasket. When to Call a Professional Call an appliance technician to replace the water inlet valve. For blocked defrost drains and tubes, if you have tried to flush them out with no success, have a technician assess the problem. These parts may need to be removed for more thorough cleaning or they may need to be replaced. Source:https://www.thespruce.com/what-to-do-about-a-leaking-refrigerator-5215687
By Timothy Dale & Richard Epstein September 27, 2022
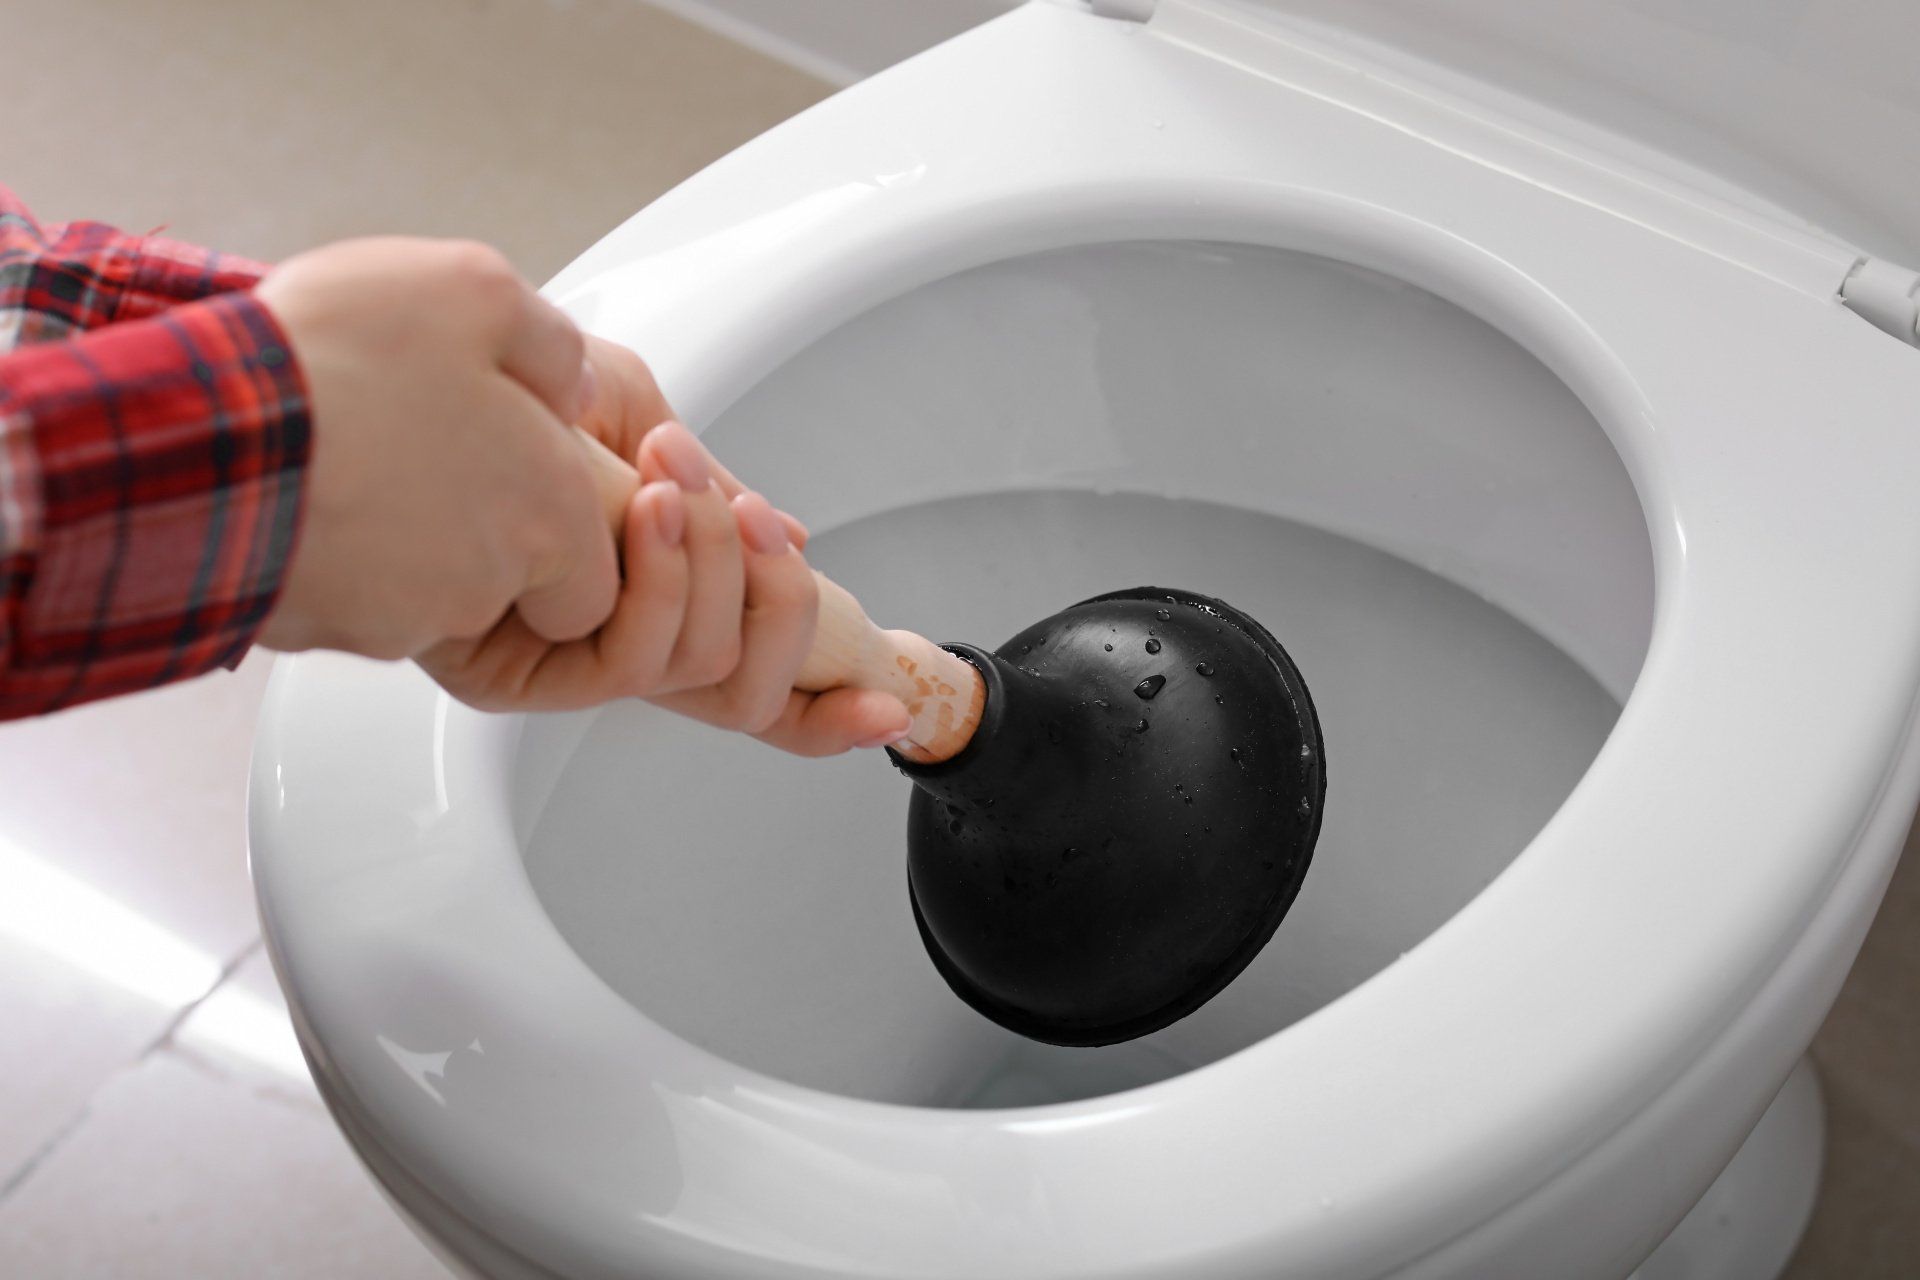
An overflowing toilet is a relatively common problem that many people have had to deal with, but the commonality of this issue doesn't mean that it isn't a serious situation that needs to be handled quickly. The water from an overflowing toilet can soak into wood cabinetry, seep into the walls, or damage the floorboards, making it easier for mold, mildew, and rot to spread throughout the infrastructure of your home. In order to solve this issue before it can become a bigger problem, it's important to find out why the toilet is overflowing, so that you can take action to resolve the situation on your own or hire a professional plumber. Take a look at this guide to learn several reasons why the toilet may be overflowing and what to do if you find yourself in this situation. Reasons the Toilet Is Overflowing There are typically four main reasons for a toilet overflowing. The drain line may be clogged, the plumbing vents are blocked, the main sewer line for the home is plugged, or, if you have a septic system, the septic tank may be full or obstructed, causing the waste water to backflow into the home. Clogged Drain The most common reason for a toilet to overflow is if the drain is clogged. Typically, an individual will use the toilet as intended, but attempt to flush too much toilet paper down the drain. The excessive amount of toilet paper clumps up and causes a clog in the drain line that prevents the water in the toilet bowl from emptying into the drain. If an individual toilet does not flush or backs up, chances are it's a clogged toilet. However, when you flush the toilet, the flush valve in the toilet tank lifts a flapper to allow the water from the tank to flow into the bowl. The flapper remains open until the tank is empty, but because the water cannot flow down the drain, it accumulates in the bowl until it overflows. This situation can also be caused by other items getting flushed down the toilet, like napkins, paper towel, feminine hygiene products, cotton balls, wipes, or other materials that are not made to be flushed. Keep a plunger nearby in the bathroom to quickly clear clogs when someone accidentally overloads the toilet with toilet paper. You may also want to invest in a plumbing snake that can be inserted into the toilet and run down into the drain to physically break up or pull out any material that is causing the clog. Blocked Plumbing Vents Many people don't know that plumbing drain lines have vents. While the drain lines carry the waste and wastewater down into the sewers, branching sanitary vent lines run to the outside of the home through the roof or through a side wall. The purpose of these vents is to help release pent-up gases that are created when the waste in the pipes breaks down. Additionally, the vents bring fresh air in from the outside to replace the air that is forced down the drain when you flush the toilet. If the air isn't being replaced because the vent lines are blocked with debris, like leaves or pine needles, then the toilet will not function properly and can lead to the toilet overflowing. Even if the toilet doesn't overflow when you flush, the absence of air in the pipes can create a vacuum that can damage the plumbing infrastructure. It's recommended to contact a professional with the specialized equipment necessary to clean the plumbing vents. Sewer Line Blockage Your home infrastructure isn't the only area where a problem can occur. The main sewer line that runs to the home can also cause the toilet to overflow if the sewer line becomes blocked or clogged. This issue can happen if people in the home flush items or materials that are not made to be flushed, like wet wipes, paper towels, napkins, or feminine hygiene products. Some wipes are specifically labeled as flushable, but even these products don't actually break down in the municipal wastewater system, so to avoid clogs, it's recommended to throw wipes in the trash, instead of flushing them. External factors can also result in a sewer line blockage, such as tree roots growing into the drain line. Another situation that could end up with a blocked sewer line is if there is any type of construction on the sewer line or on the sewer main for the street because the debris built up on the inside of the drain pipe may shift due to a change in pressure or increased vibration, creating a clog. It's important to understand that the lowest opening of the system, whether it is the cellar or slab on grade, this where the water will back up when you have a main sewer clog. It could be the septic is full, the municipal sewer is clogged, or your sewer to the street. Backflowing Septic Tank If you have a septic tank, then you won't have to worry about nearby construction causing problems for your plumbing, but you do need to be diligent about cleaning out the tank and making regular repairs to keep up with the septic system maintenance. Trying to flush waste and wastewater down into the septic tank is next to impossible if the tank is completely full, so when you flush the toilet the waste from the toilet and the septic tank may backflow into the home, causing the toilet to overflow. Similarly, if the line to the septic tank or the septic tank itself is obstructed, preventing waste from entering or exiting the tank, then it's like that flushing the toilet will only result in the waste backflowing into the home and overflowing the toilet. Contact a septic tank repair and maintenance professional to troubleshoot your septic system, clean out the tank, and make any necessary repairs to resolve the problem. What to Do If the Toilet Overflows Knowing the reason why the toilet is overflowing is important for solving the problem, but it's the most pressing issue when water is pouring onto the floor. Follow these steps to stop the water and plunge or snake the drain. If you suspect the issue is with the vents, sewer line, or septic tank, it's recommended to contact a plumber to resolve the situation. Turn Off the Water Supply The first step to resolving this situation is to stop the flow of water into the toilet bowl. This can be achieved by lifting up the lid of the toilet tank and manually pushing the flapper down to prevent the water from flowing into the toilet bowl from the tank. You can also simply turn off the water to the toilet with the water supply valve located on the incoming water supply line for the toilet. If your toilet does not have a water supply valve and you have a faulty flapper that doesn't seal properly, then you will need to locate the main water shut off valve for the home and turn off the water to the entire home. Remove Excess Water After stopping the toilet from actively overflowing, take a minute to clean up the floors with an old towel, ensuring that the floors, walls, and any other objects are completely dry to help prevent mold, mildew, and rot. With the floor and surrounding area cleaned up, grab a bucket and a small container. Use the container to gradually remove excess water from the toilet bowl and pour it into the bucket. This is so that you don't slosh more water onto the floor when you attempt to plunge the toilet or snake the drain. Plunge the Toilet If you don't have a plunger, head to a local home improvement store to pick one up. Put the head of the plunger into the toilet, ensuring the flange on the plunger is inserted directly into the drain. Keep the handle of the plunger upright while push the plunger up and down for about 15 to 20 seconds to force air and water into the drain to clear the clog. After plunging the toilet, turn the water back on and attempt to flush. If the toilet flushes without overflowing, then the issue is resolved. However, if the toilet seems as though it is still clogged, make sure to turn off the water before it overflows, then proceed to the next step. Snake the Drain Sometimes plunging the drain isn't enough to remove a clog, especially if the blockage is caused by an item or some type of material that isn't made to be flushed down a toilet. In these instances, you can use a plumber's snake to try to break up the clog or pull out the obstruction. Place the end of the drain snake into the toilet bowl and gradually feed it into the drain. When the snake won't go any further, you have encountered the clog. If you are trying to break the clog, then rapidly rotate the snake in the drain while applying additional forward pressure to drive the end of the snake through the clog. However, if you are trying to pull the obstruction out, make sure you have a hook head on the drain snake before feeding it into the drain. When you encounter the clog, instead of pushing through it, gently pull back on the snake. If you feel resistance, you have hooked the clog. Slowly reel the snake back in to remove the obstruction. Repeat this process several times to ensure that the clog have been broken up or removed from the drain line, then turn the water on to the toilet and flush to test if your fix worked. If the problem persists, it's recommended to call a professional plumber. When to Call a Professional Plumbing repairs come with a risk of damage to the surrounding infrastructure of the home because water can cause mold, mildew, and rot to spread through the wood, drywall, and insulation. This doesn't mean that you shouldn't attempt basic plumbing fixes, like plumbing the toilet or snaking the drain, but if you don't have the knowledge or experience dealing with plumbing systems, then it is recommended to leave the more complex jobs to a professional plumber. There are even some toilet tank assembly repairs you can make to replace a tank flapper, float ball, fill valve, or flush valve, but issues with the vents, sewer line, or septic tank typically fall outside of the expertise of the average DIYer. If signs seem to indicate that the overflowing toilet is a result of clogged vents, a blocked sewer line, or problems with the septic tank, then you should contact a professional plumber to troubleshoot and resolve the issue.  Source: https://www.thespruce.com/toilet-overflowing-6504068
By Timothy Dale & Richard Epstein | The Spruce September 27, 2022
A washing machine is an essential appliance to ensure that towels, linens, clothes, and bedding are regularly washed and sanitized. Whether you use a professional cleaner to launder your clothes, take laundry to a local laundromat, or use a personal washing machine in the comfort of your home, it's necessary for your personal hygiene to have clean clothes to wear to school, work, or when you meet up with friends. So, in the interest of cleanliness, it's a good idea to find out exactly how long a washing machine will last before you start to see signs of wear and tear. Keep in mind that the lifespan of a washing machine can be extended through regular maintenance , though you may also want to consider investing in a warranty to help make repairs more affordable. Expected Washing Machine Lifespan When it comes to determining the average lifespan of a washing machine, it's necessary to split these appliances into two categories . Top-load washing machines are the classic style that has been being used for generations and they typically last about 14 years. Front-load washers are relatively new to the market by comparison and they last about 11 years on average. However, it's important to understand that not every washing machine is manufactured the same, so there will be differences between brands and even between models. Additionally, two identical machines can have different lifespans depending on the conditions in which they are used. If one washing machine is well-maintained and used infrequently, then it will last longer than a washing machine that is used daily and very rarely cleaned, dried, or inspected. With regular use and ongoing maintenance, a washing machine will last about 10 to 15 years before it shows signs it needs to be replaced. Though, it should be mentioned that during this time, the washing machine may also require minor repairs to keep it working. Washing Machine Maintenance In order to keep the washing machine functioning correctly for years to come, it's necessary to keep up with maintenance tasks and avoid common mistakes, like overloading the washer. At least once a month, it's recommended to inspect the washing machine for dirt and grime that can accumulate throughout several wash cycles. Make sure to check under the rubber door seal on a front-load washer, as this is a prime location for debris to build up. You can also wash and sanitize the machine by running a high temperature wash cycle with a mixture of vinegar and bleach that will kill bacteria, viruses, and other microorganisms as well as getting rid of musty odors. To help mitigate odor problems, make sure to empty the washer as soon as possible after a load is done, then leave the door open to prevent smells from developing and to allow the washer to dry. During your regular inspection, make sure to check the hot and cold water hoses, as well as the drain hose for any signs of cracking, swelling, or leaking. Hoses can be replaced easily enough, but unseen water damage can cause much bigger problems. Also, before using a new washer, it's important to use the leveling feet on the bottom of the machine to level the washer and prevent it from wobbling or rocking during use. Signs You Need A New Washing Machine Over the course of its life, a washing machine can experience several difficulties that may be able to be fixed with minor repairs, but as these issues pile up, it's important to understand when you need to start looking for a new washer. Leaks Washing machines can leak from cracks in the hoses, loose connections, worn-out washers, or even a misplaced drain hose, so a leak can often be fixed without needing to invest in a new machine. Replace old hoses and washers to fix these minor leaks and make sure to tighten up the hose connections and check to ensure the drain hose empties into an available drain. However, if the leak is coming from a crack in the tub, it's better to invest in a new washing machine than paying for a costly repair. Unusual Noise or Movement If you have ever tried to wash a bulky blanket without balancing the load, then you know that washing machines can make a lot of noise and even shift or jump when the unbalanced rotational force of the spinning drum cause it to hit the sides of the washer. This issue can be fixed by ensuring the clothing, blankets, or other items in the washer are properly balanced and that the washer is not overloaded. Leveling the washer can also help to prevent it from moving or shifting during use, but if the problem persists, even when the washer is completely empty, you may need to call a washing machine repair professional to determine the cause. The technician can typically provide more insight into the issue, including an estimated cost to fix the problem. If the cost is too high, it's recommended to look for a new model. Does Not Fill With Water Water is needed to wash the items that are put into the washing machine, so when the tub doesn't fill with water or it only partially fills, you cannot wash a load of laundry. First, check to make sure the water is turned on to the washer. The incoming cold and hot water hoses typically have an isolation valve that can be turned off to move the washing machine, replace the hoses, or to put in new washers. If these valves are off, then the washer will not fill up. Similarly, one of the hoses could be kinked, preventing the flow of water into the washer, or a hose could be blocked. Inspect the hoses to try to locate the problem, but if you cannot solve the issue, then you will need to call in a professional or consider upgrading to a new washer. Warranty Considerations One of the ways in which many washing machine manufacturers help to instill confidence in their products in prospective customers is to offer a warranty on the washer. Depending on the manufacturer, warranties may cover the entire machine or a selection of parts, so it's important to always read the warranty and ask questions in order to fully understand what this guarantee actually covers, as well as the potential problems or situations the warranty does not cover. There are also home warranties that you may want to consider, which can help manage the cost of maintenance, repairs, and replacement for a variety of appliances in the home. However, a home warranty is more like an insurance policy in that you pay an annual or monthly fee regardless of whether you actually require maintenance, repair, or replacement services. Some warranty programs offer a set service fee per visit, instead of charging the exact cost of the repair. This means that exchanging a single washer can cost over $100, but it also means that you would be paying the same amount for a more serious repair. A washing machine could last over a decade without needing to be repaired even once, especially with regular maintenance. Just keep in mind that it's just as likely that a washer will need repairs before it hits the 10-year mark. So, it's completely up to you whether you choose to invest in ongoing coverage, or you're okay with relying on the standard manufacturer's warranty to protect your investment. Source: https://www.thespruce.com/how-long-does-a-washing-machine-last-5272534
By Lee Wallander & Richard Epstein July 12, 2022
On the side or top of your water heater tank is a valve connected to a metal or plastic discharge tube pointing downward. The valve is called a T&P valve, or TPR valve, for "temperature and pressure relief." If all goes well, a TPR valve never gets used intentionally except during testing. But in the event of an emergency or malfunction, this valve is of critical importance. It can potentially prevent your water heater from exploding. Understanding how a T&P valve works will help you keep your water heater in tip-top shape and prevent possible damage to your home. T&P Valve A T&P valve is a valve with an attached tube located on the outside of a water heater. The valve provides relief to the water heater if the pressure exceeds normal operating limits, usually 150 psi. How a T&P Relief Valve Works Mandated by all plumbing codes, the T&P valve relieves excess temperature and pressure in a water heater if either reaches a critical point. A water heater is a closed system, and thermal expansion is an inescapable fact of both normal and abnormal water heater functioning. In a standard water heater, the water is heated by a gas burner or electric elements. As the water reaches temperatures between 120 and 140 degrees Fahrenheit, both the water and the water heater's metal tank expand. Some expansion is normal, but too much expansion is unsafe. When the temperature reaches 210 degrees or the pressure reaches 150 psi (pounds per square inch), a properly functioning T&P valve opens and expels hot water and steam through the discharge tube. How a T&P Valve Is Installed When you purchase a water heater, the T&P valve generally comes pre-installed. A threaded inlet is welded onto the side of the tank. This inlet cannot be removed or replaced. The T&P valve is screwed clockwise onto that inlet. While those items are already in place, the discharge tube running downward along the side of the tank is not pre-installed. How to Install or Replace a T&P Valve Discharge Tube Installing or replacing the discharge tube is easy, fast, and there is no need to power down or drain the water heater. To install the discharge tube, run a strip of Teflon tape clockwise around the threaded end of the PVC discharge tube. Screw the discharge tube onto the T&P valve, first by hand. Follow by tightening the tube fully with a wrench. Be careful not to strip or break off the T&P valve or discharge tube by tightening it too much. The discharge tube should point straight downward, terminating a few inches above the floor. It is recommended that you place a water heater pan below the water heater to collect slow drips or to catch emergency outflows of water. [WARNING] Because the T&P valve is rarely used, mineral build-up can cause it to stiffen over time. This is a significant safety hazard because, in the event of a temperature or pressure spike, the T&P valve may not open as it should and the water heater might explode. How to Test a T&P Valve Water heater manufacturers recommend regular checking of the T&P valve. Wear closed-toe shoes to avoid scalding. Except for a bucket, no tools are required. Find T&P Valve Before you begin, make sure you know where the shut-off valve of your tank is. It's usually located on the cold water feed, on the right side inlet on top of the tank. Place Bucket Place a bucket below the discharge tube. Check Attachment Make sure that the discharge tube is firmly attached. If it is loose, tighten it by screwing clockwise. Discharge Water Briefly pull back on the T&P valve's metal lever to cause a small amount of water (about 1/4 cup) to discharge into the bucket. Release Lever Release the lever and let it snap back to its original position. If the lever does not snap back into place, the valve is faulty and must be replaced. How to Fix a T&P Valve In most cases, there are two problems you might have to address with the T&P valve: a valve that leaks by constantly dripping or a valve that sticks and doesn't open and close properly. Fix a Leaky T&P Valve When a T&P valve is leaking , it may be due to the valve not being properly seated in the threaded opening of the tank. This is especially likely if the leaking occurs immediately after an old valve is replaced. This can be remedied by shutting off the water heater and letting it cool down completely, then removing and rethreading the valve into the tank's opening. If the valve is leaking due to dirt or sediment trapped in the relief port, pull the metal spring lever back again and discharge water into the bucket. Once the lever snaps back again, if the water fails to stop completely, shut turn the gas valve to the off position and shut the water off to replace the valve. [WARNING] A water heater that periodically discharges hot water and steam from the T&P valve may be set to a water temperature that is too high. Make sure that the water temperature setting is in the normal recommended range—about 120 degrees Fahrenheit—or no more than about 150 degrees Fahrenheit. Fix a Sticky T&P Valve T&P valves can also become stuck either in a downward (closed) or fully extended (open) position. Either condition is a potentially serious problem. When stuck downward, the valve cannot provide relief if the system reaches maximum pressure. As a result, the water heater tank might rupture. When stuck in a fully extended position, the T&P valve will continually leak water down through the discharge tube, potentially flooding the home. The stickiness of the valve can sometimes be remedied by simply opening and closing the lever several times. Jiggle the T&P valve by gently pulling the lever towards you. Much like jiggling a toilet handle, this action may be enough to unstick the valve. If this does not fix the problem, replace the valve. Safety Considerations In most cases, the T&P valve will last as long as the water heater itself, and fixes are easy if you perform annual testing to catch problems early. However, some caution is necessary whenever working with a water heater, because the T&P valve can become damaged if the water heater has exceeded maximum pressure or temperature levels. If you suspect a pressure-related problem with your water heater tank, hire a licensed plumber to have the water heater inspected. Source: https://www.thespruce.com/tandp-relief-valve-hot-water-heater-1825057
By The Spruce | Lee Wallander & Richard Epstein July 12, 2022
Boilers and water heaters are important to the heating and water supply operations of the home. While they provide different services to the house—one for space heating , the other for domestic water usage—there is some slight overlap in the form of combined boiler/heater devices. What Are Boilers and Water Heaters? A boiler provides non-potable hot water throughout the house to radiators for space heating. A water heater provides domestic hot water for cleaning, personal use, and appliances. What is a Boiler? A boiler is part of a type of residential space heating device that performs the same functions as other home heating devices like HVAC systems, modulating furnaces, in-wall heaters, baseboard heaters , or any other system or device that heats space. Oil, natural gas, propane, or electricity is the energy source that heats water to near-boiling (145 to 190°F) in a large sealed tank. A circulating pump pushes the hot water through a network of pipes in a loop throughout the house. Some types of boilers push steam through the pipes. Radiators are termination points or waypoints along the hot water loop. With either, the water cycles back to be heated in the boiler again, where the process starts all over. Types of Boilers Water boiler Steam boiler Combination boiler water heater Oil boiler Uses for Boilers On a residential level, boilers are used for just one thing: producing steam or hot water for radiant heaters. What a Water Heater Is A water heater is a device that heats cold water to a specified temperature for domestic water use. Cold water enters the water heater from the top and is deposited toward the bottom of the sealed tank with a dip tube. The water is heated by coils with electric models or by a gas flame with gas models, or, in some cases, water to water (commonly known as heat exchangers). Hot water leaves the water heater from the top. The hot water is delivered to various parts of the house through 1/2-inch pipes, usually PEX or copper. What Is Domestic Water? Domestic water refers to water used for household purposes like drinking, cleaning dishes, washing clothes, watering plants, or washing the car. Types of Water Heaters Tank-type water heater Hot water recirculation pump Tankless water heater Indirect water heater Combination boiler water heater Uses for Water Heaters A water heater heats water for: Bathing at bathtubs and showers Personal cleaning at bathroom sinks Washing dishes at kitchen sinks Dishwasher's hot water source Clothes washing machine's hot water source Consumption, if desired How Boilers and Water Heaters are Similar Though they do different things, boilers and water heaters share a few similarities: Water is heated in sealed tanks Water is delivered throughout the house Both tanks are pressurized How Boilers and Water Heaters Are Different Boilers and water heaters are more different than they are similar: Boiler Water not safe for consumption Water or steam heats rooms Water heated close to boiling Can use oil as energy source Circulating (loop) Water Heater Water safe to be consumed Water not used for space heating Water heated far below boiling (120°F) Non-circulating Boiler and Water Heater Services Combined Boilers heat water for space heating. Water heaters heat domestic water. These two separate systems do the same thing: heat water. This redundancy means wasted energy. Plus, having two separate large devices uses more room in the basement, garage, or utility room. Can the two be combined? While not common, sometimes the boiler and water heater are combined either with combination boiler water heaters or with indirect water heaters used with boilers. Combination Boiler Water Heater High-efficiency combination (or combi) boilers serve both functions: space heater and water heater. Domestic water is always prioritized with combi heaters. So, when a tap is opened in the house, water flows through the heat exchanger. When hot water is needed for space heating, the water is diverted to a separate continuous heating loop for the radiators. As single, compact units, combi heaters save a considerable amount of space over a separate boiler and water heater setup. Indirect Water Heater An indirect water heater has no direct power source like a flame or electric coil. Instead, the water is heated indirectly, using the boiler's heat. A pipe from the boiler bearing hot water enters the bottom of the indirect water heater. The pipe coils in loops inside the water heater tank, then leaves the water heater to be redeposited in the boiler. Both the boiler and the water heater remain separate devices. Water from the boiler's pipe never touches water in the water heater tank. Can You Use Boilers and Water Heaters Interchangeably? No. As separate devices, boilers and water heaters cannot substitute for each other since they perform different functions. Do You Need a Boiler or a Water Heater? Homes do not need boilers but they do need water heaters. Most homes are required to have a dedicated heating source, even in areas that rarely experience cold weather. 1 That said, the heating source doesn't necessarily need to be a boiler since many other heating methods are available. Most homes are required to have hot water supplied to plumbing fixtures for bathing, washing, and kitchen-related purposes. 2 The most practical way to supply hot water within residences is with a water heater or through solar water heating. Source: https://www.thespruce.com/boiler-vs-water-heater-5223066
By The Spruce | Lee Wallander & Richard Epstein March 29, 2022
Most of the time, your home’s sump pump works efficiently and invisibly in the background. In areas with much groundwater, the sump pump's regular on and off sounds merge with the tapestry of your home life. In areas with low groundwater, the pump may not even turn on for years, if ever. Many homeowners who have sump pumps might not be aware that they have one. In fact, having a house with a sump pump doesn't always mean that there is a problem. It can simply be part of your home's overall water management system. Locating your sump pump , understanding its operations, and above all, knowing how to maintain it, are all vital to keeping your house in top shape. What Is a Sump Pump? A sump pump is a small, electrically operated water pump located in a lined hole called a sump pit. The pump is designed to be submerged in water. When the water level in the sump pit reaches a certain height, the sump pump automatically turns on and expels the water. When the water level drops far enough, the pump turns off. The sump pump is a constant vigil; it guards your house 24 hours a day, 7 days a week. What Does a Sump Pump Do? Expels Regular Groundwater First and most important, a sump pump will rid your home of groundwater intrusion on a regular basis. This is the most common use for a sump pump. When a sump pump activates, it is no cause for alarm, as the pump is simply doing its job. Groundwater coming towards the house from below or sideways is captured by permeable rock-filled drains, and that same water is diverted to the sump pit, where the pump sends it back outside. Expels Water From Flooding Second and far less common, a sump pump has the potential to evacuate large quantities of water during an unexpected water event. Higher quality sump pumps are rated at up to 4,000 to 5,000 gallons per hour discharge flow. This means that, in theory, your home’s sump pump could expel water during a catastrophic event such as minor flooding or a broken water supply pipe. In practice, this rarely happens. Sump pumps are mostly about dealing with regular groundwater intrusion. When and How Often to Maintain Your Sump Pump At the least, you should check on and maintain your sump pump once a year. However, because the sump pump is so critical to a well-functioning home, try to check that it is working several times throughout the year. Early spring is typically the season when groundwater rises in response to factors such as winter precipitation and snowmelt. So, late winter and early spring is the ideal time to maintain your sump pump. But groundwater movement is difficult to predict, and a host of other factors may come into play as well, such as soil type, local pumping operations, and changes in precipitation. This means that you should check on your sump pump throughout the year. Your sump pump is only as good as its electrical connection. Even if the pump is in top working condition, it cannot turn on if the circuit breaker to the pump is flipped off. So, checking the GFCI outlet and the circuit breaker regularly is always a good idea. [WARNING] Before beginning maintenance or repairs on your sump pump, ensure that the power is off and/or disconnect the machine from power. If the power must be on or connected while you're working on it, take precautions. How to Maintain Your Sump Pump To locate your sump pump, find the lowest possible point in your house. In most houses, this is the basement or the crawlspace . Sump pumps are never installed above ground level, on upper floors. Vibrations can cause sump pumps to tilt to the side. Make sure that the sump pump is upright and that its float ball moves freely. Does the sump pump actually pump water? That's the ultimate goal of the sump pump, and the best way to find out is to pour water into the sump pit. You will need to pour a generous amount to cause the pump to turn on. After the pump activates, stay around to verify that the water is actually discharged. All sump pumps are dependent on a GFCI electrical connection . GFCIs sometimes will erroneously turn off on their own, rendering your sump pump useless. Make sure that the GFCI itself is working and that power is running to the sump pump. Also check the circuit breaker. Common Sump Pump Problems and Solutions If your sump pump is not operating the way it should, or not operating at all, most fixes are relatively simple and inexpensive. These fixes revolve around the electrical connection, water intake and discharge, and the float and switch mechanisms. Sump Pump Does Not Turn On The water level may be too low to trigger operations. Or you might have a blown fuse or tripped circuit breaker on the service panel. Finally, pull out the pump and make sure that the inlet valve is not clogged with debris. Sump Pump Does Not Shut Off Check to see that the float switch on the pump is working properly. If not, replace the switch. Look at the discharge pipe and clear any obstructions. Also, a sump pump that constantly runs might be undersized for the job. Stepping up to a higher-level pump with greater discharge is the only solution. Sump Pump Starts and Stops Too Frequently An undersized sump pump might be the problem. But often, the solution is easier and cheaper: the discharge pipe might have an obstruction that causes backflow. Thus, water that tries to discharge is prevented from doing so. The water runs backward, filling the sump pit, and causing the sump pump to start up again. When to Replace Your Sump Pump Should you replace your sump pump if it is old but still working? While this issue of replacing working items is always debatable, some experts say that sump pumps should be replaced every ten years, working or not. If the motor is faulty, it is usually a difficult fix that may be more expensive than replacing the entire sump pump. A majority of sump pump manufacturer limited warranties run between three and five years long.  Source: https://www.thespruce.com/sump-pump-maintenance-for-the-home-4125779
By The Spruce | Mary Marlowe Leverette March 22, 2022
A clogged sink or tub drain is one of the most frustrating home problems topped only by a clogged toilet. It always seems to happen at the worst possible moment. Not every plumbing problem can be prevented, but many can by changing our behaviors. There are certain materials that solidify and clog pipes or overwhelm garbage disposals that prevent water from passing through, so if you know which ones they are, you can keep them from going down the drain. We can also do damage that isn't immediately evident but pollutes our water supplies by pouring toxic chemicals into a septic system or municipal water supply. Those chemicals end up in our groundwater, rivers, and oceans adversely affecting the health of the planet. Below, you can learn about 10 things to never pour down the drain. Coffee Grounds -Coffee grounds like to stick together and form a lump in plumbing pipes that just won't budge easily. So, even a few grounds every day can begin to add up to a problem. Luckily, coffee grounds have uses around the house and are a great addition to garden compost piles . They add nitrogen that helps break down plant material and boost the performance of the soil. Cooking Grease and Oils -You know what happens when animal fat cools—it solidifies. If it's poured down the drain when that happens, it blocks pipes. Even vegetable oils like olive, corn, and coconut that don't fully solidify coat pipes and trap other food particles. -Allow animal fats to harden and dispose of them in a trash receptacle. Reuse oils when possible or check with your municipality about recycling cooking oil. Rice and Grains -When water is added to rice or dry grains, they expand. If you pour them down the sink, they do the same thing and clog the pipe. Add the grains to the compost pile or dispose of them in a garbage bin. Eggshells -Eggshells take a very long time to dissolve in water. And, even if they are ground up in a garbage disposal, the membranes can cause clogs to form. The best way to dispose of eggshells is to add them to the compost heap or toss in the trash. Doughs and Batters -Just as uncooked rice and grains can swell in water, so can batters and dough. Take the time to add it to the compost pile or scrape it into the trash before washing bowls and utensils to prevent rinsing it down the sink. Paint -Pouring paint down the drain can leave your sink permanently stained and your pipes in need of a plumber. Every type of paint should be disposed of properly to prevent the chemicals from entering our groundwater. -Most waste management companies will accept paint cans that have a small amount of paint that has been allowed to dry out before disposing of the can. Paint can also be mixed with kitty litter before disposal. Full cans are considered hazardous waste and you should contact a waste management collection center for proper disposal procedures in your area. Hazardous Chemicals and Pesticides -While some household cleaning products recommended for cleaning a sink or toilet contain hazardous chemicals, the concentration is low. Most hazardous products like paint thinners, lacquers, or dry cleaning solvents should never be poured down a sink. The same applies to garden pesticides. -Contact your local waste management collection center about proper disposal methods as it can vary between locations. Flushable and Nonflushable Wipes -Many brands of personal hygiene wipes claim to be flushable but none of them are actually that good for your plumbing system. Attempting to flush too many wipes forms a ball that will clog the toilet and never dissolve. The same is true for condoms and feminine hygiene products. Keep a small lined trash can beside the toilet for their disposal. -Paper towels, cotton balls, make-up pads, and disinfecting wipes for cleaning or hand sanitizing should also be disposed of properly in a trash can—never down the toilet. Kitty Litter -Even kitty litter box brands that promise to be flushable are better placed in a lined trash can or composted properly . Small amounts of litter add up and can form clogs especially in the tanks of septic systems. Prescription Medications -If you dump a bottle of pills down the sink or in the toilet, while it's possible they will form a clog, they usually dissolve. The real problem is that those chemicals are entering the water system affecting living organisms and our food supply. -Most pharmacies will accept old medications for recycling. The Drug Enforcement Agency hosts a National Prescription Drug Take Back Day each year in April and October. Check with your local law enforcement department to see if they are participating.  Source: https://www.thespruce.com/things-to-never-pour-down-the-drain-5078600
By The Spruce | Lee Wallender & Richard Epstein March 22, 2022
If you have ever unscrewed the end of a kitchen or bathroom faucet or felt inside with your finger, you may have discovered a device with a small metal screen disk—a faucet aerator. The aerator is an important feature that both improves the physical operation of the faucet and enhances the experience of using the faucet. Find out why the faucet aerator is sometimes misunderstood as being primarily a filtration device. Also, learn the aerator's many other valuable purposes and why you definitely want to have one on your faucet. [What Is a Faucet Aerator?] A faucet aerator is a small, round device that you can screw onto the tip of your faucet to create a more consistent, splash-free steam of water. Aerators usually create aa mixture of water and air, making the stream smoother. Generally, a standard faucet aerator will limit the water flow to 1.8 or 2.2 GPM (gallons per minute) . This can vary & is less in some municipalities; for example, NYC is 1.5 GPM. The dual-threaded collar allows the faucet aerator to be threaded counterclockwise onto the faucet. Optionally, a plastic or metal disk with a hole in the center may be included as a flow restrictor. With the flow restrictor installed, you can expect the flow to drop to a water-saving 1.5 GPM. Some ultra water-saving restrictors will even bring the flow down to 0.5 GPM. As the faucet aerator usually comes assembled, it only needs to be screwed onto the end of a faucet. The faucet must be displaying female threads since most aerators are male-threaded (exposed threads). Faucet aerators first entered homes in the late 1940s as add-on devices that would reduce splashing and help water taste better by introducing oxygen. Today, faucet aerators are standard components on nearly all kitchen and bathroom faucets. However, you can also purchase separate faucet aerators and install them on faucets that are lacking aerators. What Is a Faucet Aerator's Purpose? Removing the aerator and tapping it out upside-down may release a small piece of grit or scale produced by the inside of the pipes. While an aerator does filter debris, this is not its main purpose. Rather, a faucet aerator improves the flow of water and helps it feel softer to the touch. By introducing small bubbles to the water, the faucet aerator allows the faucet to run longer while using less water. Creates a wider stream of waterLessens water splashing in the basinHelps save water by making water flow more productiveCan additionally save water when a flow arresting aerator is installedBubbles activate soap faster, saving soap and waterGives the water a softer feeling to the handsGives drinking water a lighter, fresher tasteFilters sediment An aerator is not necessary and may even be counterproductive on some exterior faucets (such as for garden hoses ), shower or bathtub faucets , or clothes washer water supply faucets. How to Replace a Faucet Aerator A faucet aerator can easily be replaced or installed with only two simple tools: pliers and a towel. Tongue and groove pliers (Channellock is one such brand) are the best type of pliers for this project. The towel should be small since you will be using it as a protective device when applying the pliers to the faucet aerator. With the towel, clean the inside thread of the faucet. Ensure that the aerator is fully assembled. A faucet aerator especially must have the washer in place to prevent leakage. Place the aerator into the end of the faucet until the threads catch. Manually screw the aerator clockwise firmly into the faucet. Wrap the towel around the faucet aerator and tighten with the wrench. Turn the water on full volume to test. -Tip: Do not tighten the aerator too much or you risk stripping the threads on either the faucet or the aerator. How to Clean a Faucet Aerator Cleaning a faucet aerator can sometimes improve the flow of water by removing sediment, scale, or other grit from the mesh filter. Even if your water flow is satisfactory, you should clean it at least twice a year to maintain water freshness. Close the sink stopper to avoid losing parts down the drain. Remove the faucet aerator and place it on a clean towel. Take the aerator apart if possible. Soak the aerator in white vinegar (or CLR) for an hour. Remove the vinegar and rinse with fresh water. Replace the aerator on the faucet and turn on the water to test Source: https://www.thespruce.com/why-you-need-to-install-faucet-aerators-1821314
More Posts
Share by: